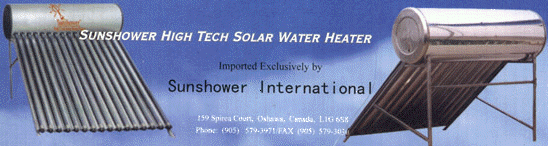
The Sunshower High Tech Solar Water Heater is a product that uses the highest and most effective solar water heating technology according to the Energy Efficiency and Renewable Energy Clearinghouse of the US Department of Energy. It has the ability to heat water to the boil and is the ideal way to provide for all of your hot water needs at your seasonal residence without any energy cost. In fact, it can even save you significant money if it is installed as a parallel or "preheating" system to a conventional hot water system in a permanent residence.
2. Why might you want a Sunshower High Tech Solar Water Heater?
Hot water for showering is one of the biggest desires of most cottagers, but because of the energy expense, is often a luxury we do without. In your seasonal dwelling, if you were to install an electrical system using Public Utility Hydro to "fuel" your system, you would be installing one of the most expensive energy users of electricity. Propane is almost as expensive, and in both of these cases, because of the high cost involved, cottagers usually only turn on these systems when they want hot water — and then they wait for the water! If your heater is powered by an electrical generator, besides waiting for your hot water, you would have an additional irritant…the noise that most cottagers try to avoid. With the Sunshower system, "free" hot water is always available when you want it simply by turning on a tap; its heavily insulated 25 gallon tank will provide all of your seasonal residence hot water needs—conveniently and always available when you need it…no waiting, no noise, no cost!
3. How much sun is required to power the system up?
The Sunshower system needs only 3 or 4 hours of sun daily to operate but in the case of little sun for a day or two, it will keep the hot water "shower hot" for 72 hours without sun so that hot water is always available immediately in the morning when you arise and also available to you anytime immediately upon your cottage arrival.
4. How does the system work?
The heating ability does not depend upon the ambient outside temperature but comes from the radiant energy of the sun…the kind of heat that is felt through a window on the coldest winter day. In the case of the Sunshower High Tech Heaters, the radiant energy is "trapped" within solar heating vacuum tubes manufactured from special high energy absorbing tempered glass. While externally remaining cool to the touch, internally they reach temperatures in excess of 300 degrees and are the "heart" of the system—the heating elements to quickly heat your water. All of the water movements in the heaters result from naturally occurring convection currents, the same currents operational in conventional gas and electric heaters and so there is no need to provide any pumping system to circulate the water. Cold water is heavier and naturally migrates to the bottom of the unit, the heating tubes. As the water heats, it becomes less dense or lighter and naturally migrates upwards to the heavily insulated hot water holding tank. These movements are continuous in response to water temperature differentials within the system.
5. Can you provide any evidence that solar water heaters are effective?
Travellers know that hot water produced by solar water heaters is used widely in many parts of the world. Because of abundant low cost energy in North America, we have not up to this point conducted research to develop appropriate technologies to keep current with practices in other parts of the world where the vast majority of hot water is produced from solar heaters. Here are pictures(pic1, pic2) of solar heaters as the sole source of hot water plumbed into each suite in these modern new apartment buildings. Effective? You be the judge!
6. What is the capacity of the product?
Approximately 25 gallons of hot water. The heater is always full, since like your water heater at home, it is plumbed to fill as water is drawn from it.
7. What is the weight of the filled unit?
Installed and filled with water, the unit weighs approximately 300 pounds. Its footprint is approximately 5 ft X 5 ft and its height approximately 4 1/2 ft.
8. Are Special Skills required to install the system?
No! The Sunshower system is a "pressure-free" system and a simple installation can use garden hose for cold water lines and dishwasher hose for hot water lines. A caution is that garden hose cannot be used for the hot water lines since it is not designed to withstand the high water temparatures that are achieved. All of the fittings for both hot and cold lines can be screw type garden hose fittings available from your local hardware store. There is no need to hire expensive plumbers or to be a knowledgeable handyman—with the instructions provided and the available "help-line", installation is simple; something anyone can do! Of course, copper piping and soldered fittings can be used for those who prefer.
9. Is this system safe for amateurs to install?
Yes! The heater is a pressure-free system plumbed to maintain normal atmospheric pressures inside the system and thus all hookups can be safe and simple "do-it-yourself" operations. There is never any danger of pressure buildup in response to the water heating.
10. How is the water drawn off the heater?
The hot water can be drawn from the system by gravity feed OR can be drawn off into a small pressure tank by a small AC or DC pump to give you a pressurized water delivery system. No matter how the water is drawn off, it is drawn from a stainless steel pressure-fit pipe inserted in the top hole on the side of the heater. For pressurized hot water delivery systems see the Plumbing Diagram. You could used the same plumbing diagram for a gravity feed systems simply by not installing the pump and pressure tank in the hot water feed line. These can be installed at any future date should you feel that you want a pressurized hot water delivery system.
11. How is the system filled with cold water?
The heater is plumbed so that cold water automatically gravity fills the heater from a cold water cistern as hot water is drawn. Water from the cistern enters the heater through connection of your cold delivery hose to a stainless steel pipe provided which is pressure-fit inserted into the lower hole on the side of the heater. A "T" and a tap inserted on this line will help in winterizing your system as explained in FAQ #14. This same cistern provides cold water to the shower head, because like your hot water at home, the hot water produced is too hot to use without being moderated with cold water.
12. Is a plumbing diagram available?
Yes! The diagram linked following this answer is for a pressurized hot water delivery system. For a gravity feed system, simply eliminate the AC or DC pump and the pressure tank. These can be added to your system at a later time if you feel you want to switch to a pressurized delivery system.
Plumbing Diagram13. Can I hook this pressure-free heater up to a pressurized cold water supply?
Yes! Because the heater is a pressure-free system, however, it is required that you remove the water pressure first by feeding the pressurized cold water delivery into a small tank controlled by a float valve sitting on a saddle on the heater tank. This will remove the cold water pressure and provide for a gravity feed flow into the heater as hot water is drawn from it. The tank installed could be a small plastic tank similar to a toilet tank controlled by a toilet float valve or other similar control valve available from your hardware or plumbing supplier. The water pressure is reapplied to the hot water line as it exits the heater by installing a small pump and pressure tank into the outlet line before your first tap. You may see a photo of such an installation by clicking the link below.
14. Can you give me some ideas about different installations
Installation variables are endless and limited only by your imagination. For gravity feed systems,the heater can be installed on your cottage roof or on a tower erected beside your cottage. For pressurized systems using the small pump and pressure tank as explained in question 7, (Plumbing Diagram), the heater can be installed on the ground. For a primitive shower, it can be installed on a tower erected remote from your cottage with the 4 posts of the tower closed in with wood or towels to provide walls for a "shower-shack beneath the solar heater (Shower Shack). In this case, the shower would drain into a leaching hole filled with rocks and covered with a wooden skid as the floor of an "outhouse-like" shower.
As you can see, the plumbing and installation can be as simple or as sophisticated as you like --- but in all cases with the instruction provided, it is just a simple do-it-yourself installation. The system is so adaptable that any initial installation can be easily changed at will. This is a purchase that can be made now --- installed, used, and enjoyed in a temporary or primitive but utilitarian way, and at any future time can be reinstalled in a more permanent and sophisticated fashion...but in the meantime you have a source of "FREE" hot water.15. How is the system winterized?
Winterizing is a "snap"! Drain the water from the heater tank. There will be a small amount of water remaining in the bottom of the tank and the glass heating tubes will still be full. While this water will vaporize given sufficient "above freezing" temperatures and sufficient direct sunlight, to be completely safe from freezeup, we recommend that you take the precaution of pulling the pins on the self levelling feet of the front legs and tipping the unit up to completely empty the water from the heating tubes. We recommend that the unit be left in this "uptipped" position over the winter and then returned to its usual position when you are ready to "startup" the system in the spring. If there is danger of falling branches, etc., you might take the additional precaution of covering the unit with some protective covering. The only additional maintenance is periodic cleaning of the outer surfaces of the vacuum tubes with any household glass cleaner to insure that they maintain their heating efficiency.
16. What are my annual hot water heating savings if a solar water heater is used in conjunction with a conventional water heating system in my full-time residence?
Water entering your building is the same temperature winter and summer and has to be heated to thermostatically controlled levels in your insulated tank. Think about it. Outside or seasonal temperatures have no impact whatsoever on water heating costs. It costs you the same to heat your water in the summer as in the winter. Therefore, you can save ¾ of your water heating energy costs for the 9 months period from March/April to October/November that you can use this system…a significant savings considering hot water heating is the second costliest electrical energy user in your residence. The Sunshower Solar Water Heaters can be plumbed as the exclusive hot water source in the warmer 9 months and with the twist of a tap can be shut down to redirect your cold water inlet lines into your traditional system for the December to March period. Another way to plumb your system for equally effective savings is to use a solar water heater as a pre-heater for your water feeding your conventional hot water tank for the March/April to October/November period.
17. How do you transport the system around?
Transportation of the units is a "breeze"! The boxed unit weighs about 115 pounds and two can easily fit into the back of a jeep or minivan.
18. Do you also handle commercial models as well?
Yes, we do and government subsidy grants are presently available. For details, please go to Commercial Model.
19. Do you have any way to provide further details that will help me understand the system better?
The video on the home page gives a detailed explanation of the "science" behind the operation of these heaters. We also exhibit annually at the Toronto Canada cottage life show where you can talk with us about your installation and see the product. There are also a growing number of installations and these will gain a lot of attention from the surrounding cottagers. We are as close as your telephone at our HELP HOT LINE at (905) 579-3971 or e-mail us. Detailed contact instructions are at the addresses provided in the "Contact us" link. You may find that questions you ask find themselves onto our FAQ's listings to help other viewers.
20 How do I contact you concerning other questions?
Go to Contact Us
21 How much does it cost?
CND$995 (FOB Oshawa, Ontario, Canada) and the 750 gallon commercial unit is approximately CND$8995(FOB Oshawa, Ontario, Canada), but depends on quantities ordered.
22 Can you provide simple step-by-step plumbing instructions to install the heater into a shower system?
Easy! You may want to refer to the plumbing diagram although that is not necessary.
1. Find a way to pump cold water into a plastic cistern barrel that is mounted above the heater. The water should enter the top port of the barrel and exit from a bottom port of the barrel. Be sure to drill a small "weather/insect protected" hole (1/16") in the top of the barrel to avoid any pressure buildup in the barrel as it is filling.
2. Run a cold water line from the bottom port of the cistern barrel to gravity feed into the bottom port of the heater. Install a "T" in this line to run a cold water line into the shower. Attach a "cold tap" on this line inside the shower.
3. Run a hot water line from the top port of the heater to a "hot tap" in your shower. You should install a "T" in this line just outside the heater and run a "pressure-relief" line up and above the level of water in your cold water cistern. This line can be screened at the top but should be left open to maintain atmospheric pressure inside your heater. It also controls the flow of water into your heater from the cistern. Without this line, water would overflow out of the heater until your cistern ran dry. Because water seeks a common level, water will fill this line until its level is equal to the cistern water level. At this point, water will stop flowing from the cistern to the heater.
4. The taps installed in #2 and #3 are used to adjust the water temperature as needed.
5. Attach a dishwasher hose "Y" to both the hot and cold taps inside the shower and run a single "mixed hot/cold water line" to a small AC or DC pump (approximately 3 ½ gpm) and then to a small diaphragm pressure tank (approximately 3/4 litre). This pump and pressure tank, available at any RV/Boat/Solar/Plumbing supply dealer, should be installed outside the shower area. A DC pump can be powered by a deep discharge battery, which can recharged by a solar cell or simply conventionally recharged when it is depleted.
6. Run this "mixed line" from the pressure tank to a tap installed just before your showerhead. Turning on this "control tap" causes a loss of line pressure activating the pump to maintain water delivery pressure at 20-40 pounds to give a shower similar to conventional systems in a permanent residence.
7. To have gravity feed system rather than a pressurized system, simply omit the pump and pressure tank in #5 and the "control tap" in #6. All other plumbing is the same and the pump, pressure tank, and control tap can be added at any time when you desire a pressurized system.
8. All cold water lines can be garden hose with screw type fittings while hot water lines can be dishwasher hose again with screw type fittings. Of course you can use copper piping with soldered fittings for all lines if you wish.
9. You’re done! That’s it! Simple! Something anyone can do!
23 Can you provide step-by-step instructions to erect the "boxed" heater?
The boxed package contains:Putting the System together:
1. All necessary bolts, nuts, washers, gaskets
2. Stainless steel insulated tank
3. Stainless steel mounting stand comprised of:
a) Two 47¼ inch angle iron / function: front tube support legs
b) one 42¼ inch angle iron with 13 quarter inch holes / function: reflector holder at lower end of tubes
c) one 42¼ inch angle iron with 2 hole "L" on each end / function: reflector hold at tank end of tubes
d) two 29¼ inch angle iron rear leg / function: mitered end bolts to strap attachment at tank end
e) one 41¾ inch angle iron with "T" at both ends / function: latera support between rear legs
f) two 28½ inch angle iron / function: lateral support between front and rear legs
g) four foot pads with mounting bolts and pins
4. 12 vacuum tubes
5. Stainless steel reflector panels
6. Stainless steel inlet and outlet pipes
7. Six plastic protective double tube supports for pointed lower end of tubes
Picture of solar water heaters
1. Lay tank out so strap attachments are facing up.Back
2. Bolt rear legs (d) to vertical strap attachments on tank with mitered end of leg bolted at tank end. Install foot pads (g)
3. Bolt lateral support (e) between rear legs (d)
4. Bolt front legs (a) and reflective panel holder (c) to angled strap attachments on tank. Make sure channel (c) opens away from the tank and on the top surface of the leg to eventually hold reflector panels. Install foot pads (g)
5. Bolt lateral support parts (f) between front and rear legs
6. Turn heater system rightside up and stand on legs
7. Bolt lower holder for reflector (b) to top surface of front legs (a) with channel open to tank to eventually hold bottom end of reflectors
8. Install reflective panels with self tapping screws to parts (b) and (c)
9. Put black cosmetic gaskets on vacuum tubes, wet outside of tubes with water, and then twist open end of vacuum tubes into inner tank
10. Bolt black protective tubes supports to holes in (b). To properly install these, it is necessary to twist vacuum tubes farther into tank than required and then twist the tubes back down into holders once they are installed
11. Twist copper fitting with "T" end into water output hole and copper fitting with 45° elbow in input hole in tank end and then plumb in the system
12. If your system becomes dry through evaporation, be sure to fill it when the vacuum tubes are cool to avoid breakage. This is not a problem when the system is used frequently since it is designed so that the tank bottom and tubes won’t drain through use.
Have A
1 comment:
You discuss using your hot water system for showers. Is this water hot enough to do dishes?
Post a Comment